The evolution of digital camera has given an ample space to its users to capture even the tiniest moment of their lives and relish them in future. One of the best features of digital camera is that you can capture and delete the image until you get satisfied. Therefore, all digital cameras use memory cards to store the captured photos and videos. There are various kinds of memory cards available with different storage space, speed and sizes.
Sometimes our careless attitude or accidental pressing of deletion button of the digital camera may cause loss of our valuable photos. However, in most of the cases these photos are not permanently gone and you can recover lost or deleted pictures from digital camera.
Your photos or pictures are not deleted permanently when you delete your photos or format your drive. It remains there, only that the system marks the space on the memory card as unallocated and ready for overwriting. Only overwriting causes permanent deletion. Before overwriting, it is always possible to retrieve your photos from camera.
- Stop using the camera immediately after an unwanted deletion. Otherwise this may cause overwriting and make deleted photos unrecoverable forever.
- Don't pull out the memory card without switching off the camera as this may cause interruption in read/write process and can cause photo loss.
Recovering of deleted photos is now possible and easy. There is software to recover deleted photos or picture. With Do-it –Yourself Photo Recovery solutions from Stellar you can recover your lost/deleted photos even from formatted camera memory card. It is an award winning software and supports photo recovery from all types of digital cameras. Start downloading your photo recovery software now!!
After downloading and installing this software, follow these steps to recover deleted photos from your camera:
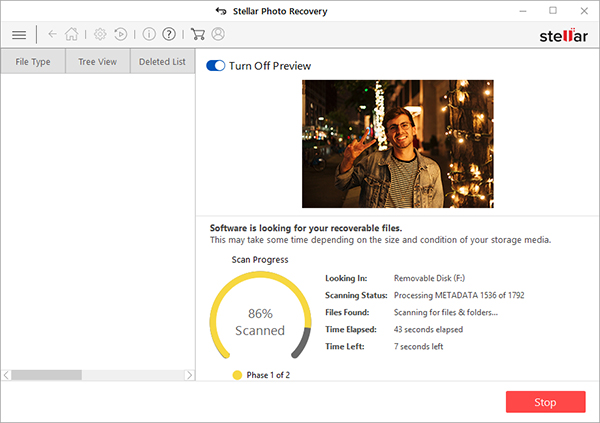
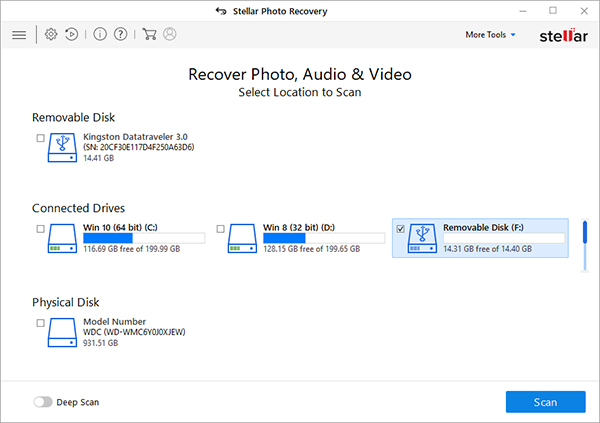
- Select the drive or storage media to scan and recover from. Click Scan.
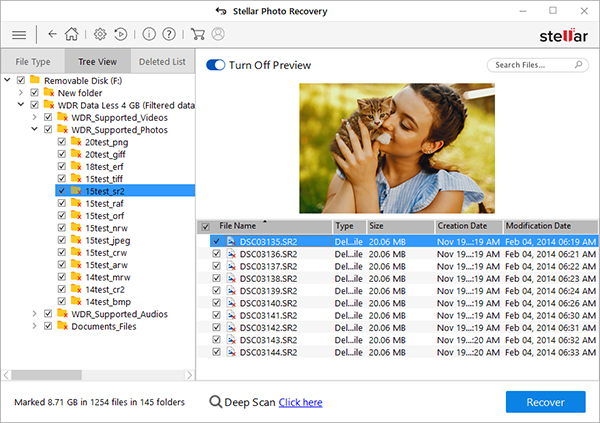
- A dialog box of 'Scanning Completed Successfully!' appears. In the left-pane of main window, all the found files and folders are listed. The bottom-right pane lists the files stored in the selected folder. Select a file and preview in the right pane
- Select the desired files and choose Recover. In the dialog box, specify the location to save the media files. Click Save to save the file in desired location.
Note: Choose to customize the recovery process through Advanced Settings icon on top. Select a specific file type, add new file type or edit Header to scan for exact results.